Wooden Boat People
By McKenzieDriftBoat.com
Trailer Drawings
Just wanted to share the trailer drawings I mentioned a while back. Might be useful to someone who is looking to build one from scratch. The drawings are not complete as there is no tongue, lights, or axle/wheels. But, the most difficult part of building a trailer is making decisions on overall size, etc.
We have also made some separate detail drawings of the flip-down trailer stand we are showing attached in the drawings.
The measurements for this drawings came directly from my drift boat trailer, which is a manufactured trailer, but I do not know the maker. Please shoot any questions you might have as it would be fun to work through them with my students.
More to follow as we detail out the drawings.
First is a rendering, should show on your screen. Then, two drawings (one with dimensions in .pdf form)
Views: 9013
Replies to This Discussion
-
Permalink Reply by Tom Anderson on
-
Hey Tungsten,
Sorry it took me so long to get back on here. So, to try and answer your questions:
At the front corner of the main frame; the drawings show the side and front members mitered together. This miter would not be a 45deg. miter since the two members are different widths (2" and 3"0. This is how we will fit up this joint, but certainly is not necessary. You could simply use square cuts and butt-join the to together, but plan where the open-end ends up and consider it in your overall plan.
Then, we showed the diagonal coming back and fitting into that corner as a 'coped' joint. As in carpentry, a coped joint is when you cope (cut) the shape of the piece you are joining to into the end of the piece you are working on. You will see that rectangular and square tubing has rounded corners. Don't worry about trying to cope the ends of you joining tubing though as the void in the radius provides a nice area to build up a weld. In fact, if a coping job is too good, you would have to then back-grind a bevel so that you're not trying to weld a very fine feathered edge on the coped piece.
Looks like someone has already posted a link to one of the trailer maker's website showing a picture of the way their joints are made up, and they look great. The main thing is a good solid weld with full penetration.
-
Permalink Reply by Phillip Westendorf on
-
Tungsten,
To answer your question as where to start:
Start by tacking the four pieces of the rectangle on the outside surfaces. Use clamps and diag. bracing as required. You can tack the bracing in place. Begin with the welds at the rectangle's Starboard (left) front corner, then the Port (right) front then the rear corners. The North south tubes at the front will be open and the front horiz tube (left-right)will butt against the North -South.
The continuous first weld should be the on the outside of the left-right tube(vert.) on the front (outside) of the tube.
The second weld will be the top and bottom welds of the corner (horiz) and the last the inside fillet weld. This will minimumize the distortion (pull force) and maintain the 90 degree angle.
I'd think if you maintain bracing you can do each corner complete before you move to the next corner. If not do each weld at the four corners before you do the second, third and fillet welds each.
For the rear tubes I'd lay it out like the drawing (the left-right tube extends beyond the North-South tube. gain Weld the outside butt weld first. When you cut the 45's on the tonge bracing it will cover the open end of the North-South tubes and look clean.
I built a flat trailer(for ATV) a few yrs ago using this technique and it's still running the roads. Hope this helps.
Dorf
-
Permalink Reply by tungsten on
-
Thx Dorf,i'll have to read that a few times to get my head around it,
something like this,http://www.driftboattrailers.com/Photos.html the carpeted bunk pic shows the joint
-
-
Yup! That's the one. I like the recesseed LED lights too. I plan to extend the rear tube enough to have the light in the horizontal rear tube (as opposed to the inclined short tube in the photos). I am also thinking of extending the step from the rear of the fender to the extended rear tube, just for looks.
I have a friend who ownes a mill and plan on having him add the light pockets, otherwise a hole saw and sawzall or grinder is the backup method.
The main point on my essay was to caution you on welding the outside butt joint first to minimize the distortioin by welding the inside fillets first. Heat on the inside will pull the tubes together trying to close the 90 degree angle.
G'Luck
Dorf
-
-
Great write-up Dorf.
Tungsten, that's pretty much how I'd do it, if you are butt-joining the front and side frame members.
As Dorf described, if you run the side member 'full-length', and butt the front member into the side of side member, then the 45deg back end of diagonal member will cover the open front end of side member. What?
-
-
Just for the record, Port is Left and Starboard is Right. I incorrectly stated this above.
Dorf
-
-
Tom Anderson,
Question, the width of the trailer on your drawings is 64". What is the basis for this width? A 52" boat will have a ton of room between the fenders. Most fenders at 9" width gives you an OAW of 82". Seem to be a bit much????
Dorf
-
Permalink Reply by Andrew on
-
Most commercial drift boat trailers measure out it 60-64" so I suspect the plans are based on that. Tom mentioned that the plans were based on a Baker trailer he measured.
The extra width of the trailer is needed to accommodate the flare of the boat. My current trailer is 48" wide between the fenders, and my boat has a 48" floor, but my boat does not fit because it hits the fenders. My boat is 56" where it hits the fenders.
When you see most drift boat trailered there is not much clearance between the side of the boat and the fender.
Andrew
-
-
Yes, the fenders always stick up above the frame by quite a bit, so by the time you get up there, the sides of the boat are flared out quite a bit. I still have my boat propped upside down on my trailer, so i can't get photos and measurements right now, but some quick math with the angles and lines from Roger's book would provide some answers.
Sounds like a good practical application for Geometry skills in my design class.
-
-
Picked up my steel yesterday,i gotta say that the 3x3 sure seams like over kill.I'll only use it for the tongue.The trailer is going to weigh more then the boat.
-
-
I debated about just using 2x3 on the tongue as well, but though people who know more than me use 3x3 so that's what I did.
I have no doubt my trailer will weight more than the boat. The axle and wheels alone will weigh 150lbs.
Looking forward to see your progress on the trailer.
Andrew
-
-
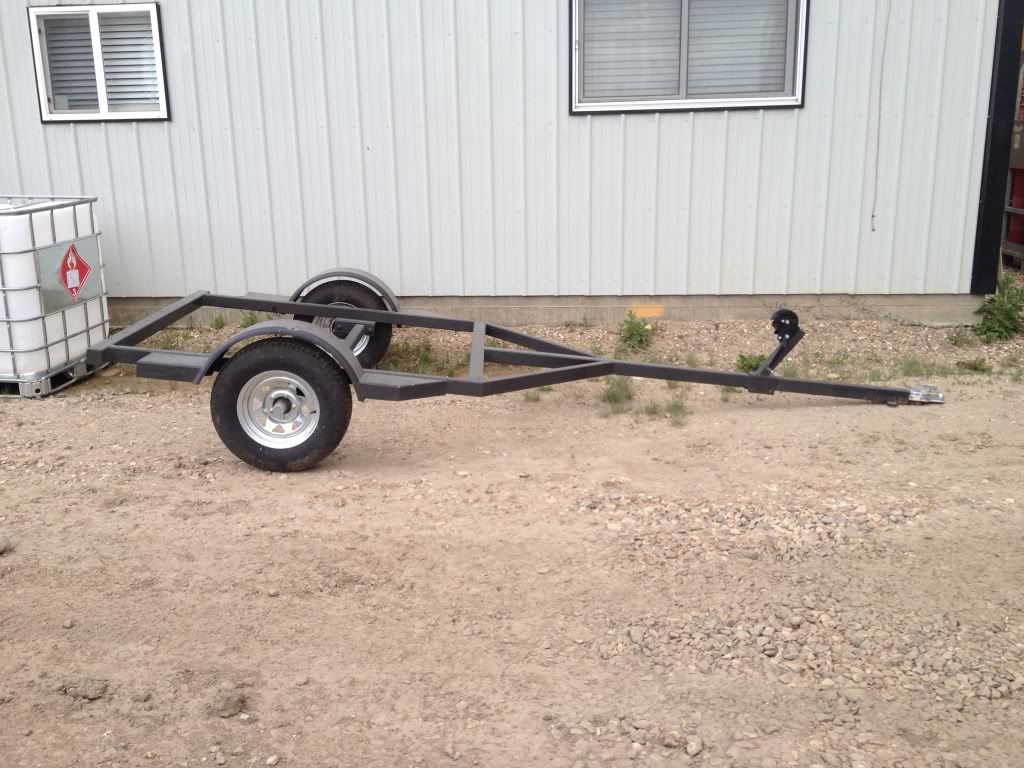
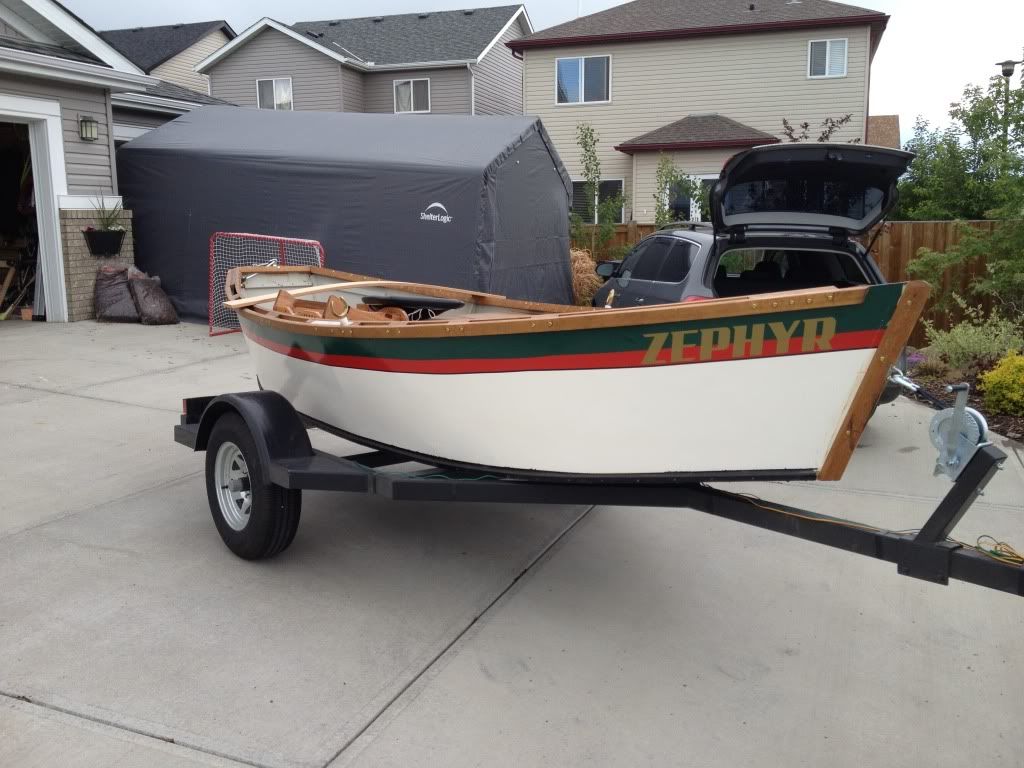
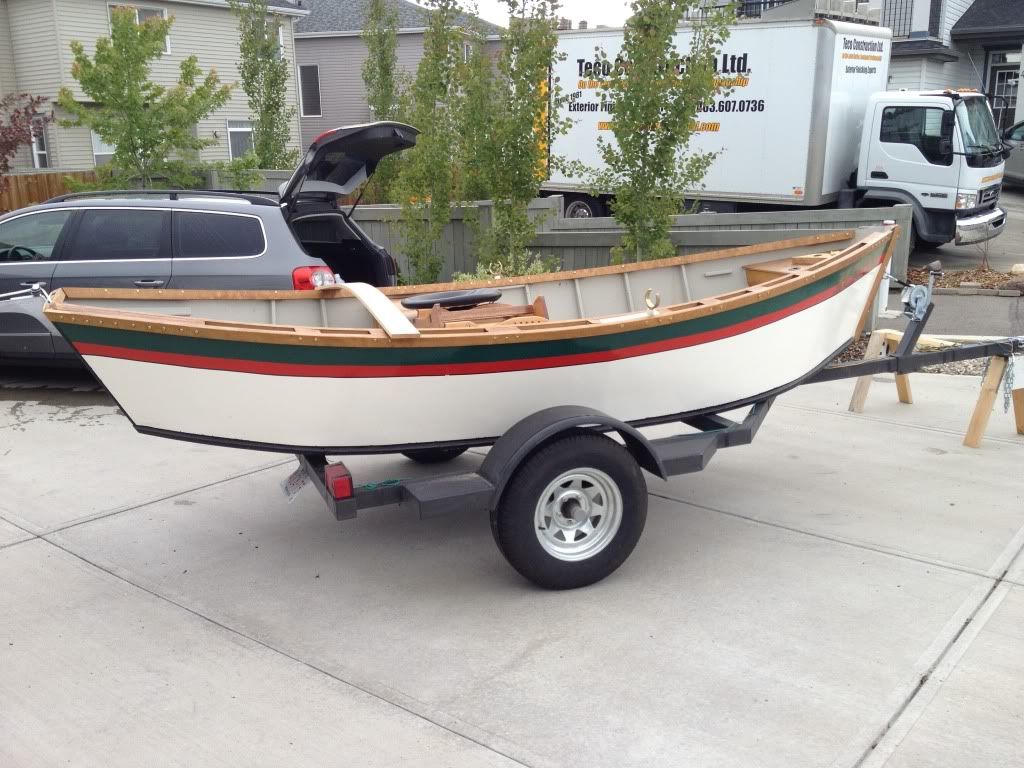
Well, after some time and figuring out a few more things I picked up the trailer. I still have to add the final wiring and a roller, but I am very happy with how the trailer came together.
For future reference the trailer I had built has a 22* down torflex axle and 14" wheels.
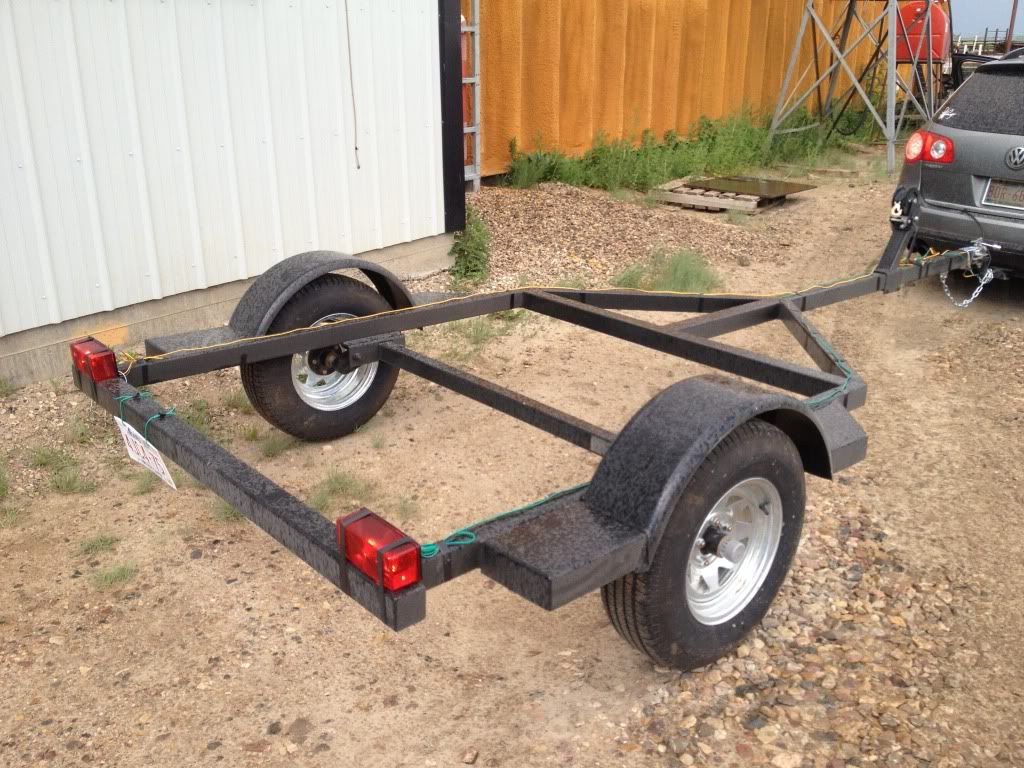
World quickest wiring job as the rain was coming quickly

© 2026 Created by Randy Dersham.
Powered by
![]()