Drift Boat Project #3
Here we go again. Taking a little road trip to Oregon this weekend to pick up a genuine piece of driftboat history – a 1960’s era Keith Steele McKenzie boat.
This will be my third driftboat project and I am super excited to have one that was built and used in Oregon by a legendary builder.
My first boat was an early 1990s Tatman kit that I built while living in TN and sold a few years after building it. My second one was all fiberglass of my own design and build. That one was stolen a few years back.
Now I’m living out west and it just won’t do to not have a drift boat. I have spent several months deliberating on whether to build a super nice wooden one, pick up a cheap used glass one, or look for a Woody Hindman or Keith Steele. As luck would have it, this Steele boat showed up on Craigslist and a friend, knowing I really wanted one snagged it before someone else could. An older guy in Oregon had the boat built for him by Keith Steele sometime in the 1960s after Steele gained notoriety for building the first Grand Canyon dories. He had a stroke a few years ago and realized it was time to let the old girl go.
The boat looks all original and complete and the owner says it is solid and perfectly usable as-is but my friend and I are going to go through and restore her. But maybe we’ll do a float or two in her first.
So what do y’all think… should I finish the whole boat with a bright finish or paint the outside? If paint, what color? My first one was hunter green with a tan rub strip and bright inside. I liked that look. Also thinking of maybe a turquoise color. It currently looks to be painted white.
I'd also really like to go by Steve Steele's shop while I am nearby. Anybody know how to contact him?
Tags:
Replies to This Discussion
-
Permalink Reply by CWarmouth on June 17, 2016 at 10:58pm
-
Thanks again, Rick.
Anybody else have any thoughts on this before I start cutting frames this weekend?
I always assumed the frames were all 1.5" at the gunnels, meaning each one would have a little different taper. I'm having a hard time imagining how the gunnel spacing is going to look right. I mean, my tape measure doesn't lie but...
Anyone want to take some measurements off their boats for me to see if this is some weird anomaly?
-
Permalink Reply by Mike Thomas on June 17, 2016 at 11:47pm
-
Pretty sure almost everyone cuts a taper angle on the inside of the side frames. You just want to make sure the tops are wide enough (but not too wide) for whatever spacing you are using between the rails. Once the frames are in place, you can go back and cut the tops of the inside frames parallel with the outside of the frame at the depth of the rails you are using to get a straight place for the rails to fit into. 1 1/2" sounds right for your boat.
As a example I made my space between the rails 1 1/4", I cut a block to use as a spacer at 1 1/4". So I ended up with a inside taper of 3 1/2" on the bottom to 1 1/2" at the top. Then I used a spacer to lay in place at the top and cut the notches for my rail size depth. (I also added some blocks next to my frames so I notched those too and used them as a depth marker to make the bottom cut for the notch)
You should be able to almost use your old ones as patterns? I`m not saying this is how you should do it, just showing how I did it to make the inside rail run with the outside rail and keep the spacing the same;)
I saw another method I think in a old Tatman book where he cut the inside rail with a taper on it on the frame side. That would give the appearance of the inside rail being square with the outside rail, but that space would not be square if you were to bolt something between the rails, like the oarlock blocks, so I didnt care for that method myself.
-
Permalink Reply by CWarmouth on June 18, 2016 at 1:30pm
-
Thank you for the reply. Mike. And it's always great to see pics of your boat.
I can use the old frames for reference, yes. What I am confused about is why each of them (or several of them) is a different width at the gunnel. It seems like they should be tapered such that they are all the same since they are what the inner gunnel attaches to. The one closest to the stem is only 3/4"! Then they range up to 1.5". I don't know if I should make them exactly like the originals or go with what I would think is the more proper way of tapering each one individually so that it is 1.5" at the gunnel.
-
Permalink Reply by Mike Thomas on June 18, 2016 at 2:37pm
-
Your frt ones are thinner because of the inside rail coming into your stem making a wedge, so you`ll want those thinner for the frt, and then you`ll have to figure out what your rear rails are going to do too. I kept my rail spacing because I tried something different in the frt.
Ya, that is part of the building. On my boat I had no plans, so I had to cut all the frames close to the same length to begin with. Then after I got my plywood line, and cut the frames down to the plywood, each one was a different thickness at the top, the frt frames are long(or tall) and the rear frames are much shorter. So when I cut my frames in the beginning, I made the inside tapers all the same, like 3 1/2" at the bottom, to 1 1/2" at the top. Thats why you`ll notice in that pic I posted, its a middle frame and is pretty thick at the notch. I had a couple long frames that I had to add just a tiny pc too to get my 1 1/4, but most of them worked out ok.
If you had working drawings, you could cut the frames at the correct lengths, and cut the tapers to be just right. And you could get really close having your old frames to work with.
-
Permalink Reply by Mike Thomas on June 18, 2016 at 2:47pm
-
Permalink Reply by Mike Thomas on June 18, 2016 at 2:59pm
-
I cut my frames so they would be long enough, but I think just used a educated guess. The frt I tried (or did) was just a block, but yours will have that nice taper into the frt stem, and then filled in with a nice wedge betwen the rails. I was going to do that and I kinda wish I would have, but I had this grand idea to be different. I`m guessing thats how yours was built. nothing like my thing
-
Permalink Reply by Rick Newman on June 18, 2016 at 3:11pm
-
I agree with Mike's assessment of why the frame tops are different widths. Some boats like Ostrem's and maybe Mike Bakers have the same width along the gunnels. Others like my Tatman and Steve Schaffer's taper at the front and the spacing decreases at the front. Look through some of the photos from my past albums of the Wooden Boat Festival pitures within my albums.
Rick
-
Permalink Reply by Mike Thomas on June 18, 2016 at 3:22pm
-
Always think a few steps ahead of where you are at. Figure out how your inside rail will taper and blend into your stem, and then you`ll see how the rails need to be. Even use a scrap pc of wood to get a visual if needed
-
Permalink Reply by CWarmouth on June 18, 2016 at 9:53pm
-
OK, great. I got my head straight now. Thank you. I was not thinking about reducing the spacing for the wedge up front. And the block at the rear is 1.25" so that all makes sense now. I got some bottom frames cut and will start on some vertical frames tomorrow.
Mike, your joinery work is beautiful.
-
Permalink Reply by Mike Thomas on June 19, 2016 at 1:44pm
-
Thanks, some years of trim carpentry came in handy. I was trying to find where I had to add a pc to the top of the frame to get my 1.25 but I matched the end grain of that DF so good I cant even find it :)
Interesting to me is that your rear block is 1.25. I just pulled that out of my hat when I did mine cause it seemed to fit good. So I was in the ballpark after all.
Are you using your old rails?
-
Permalink Reply by CWarmouth on February 27, 2017 at 6:20pm
-
Hey guys. It's a been a good while since I have posted any progress on this old boat. It's because I got in over my head and decided to have a big bonfire with it.
Nah... Just kidding.
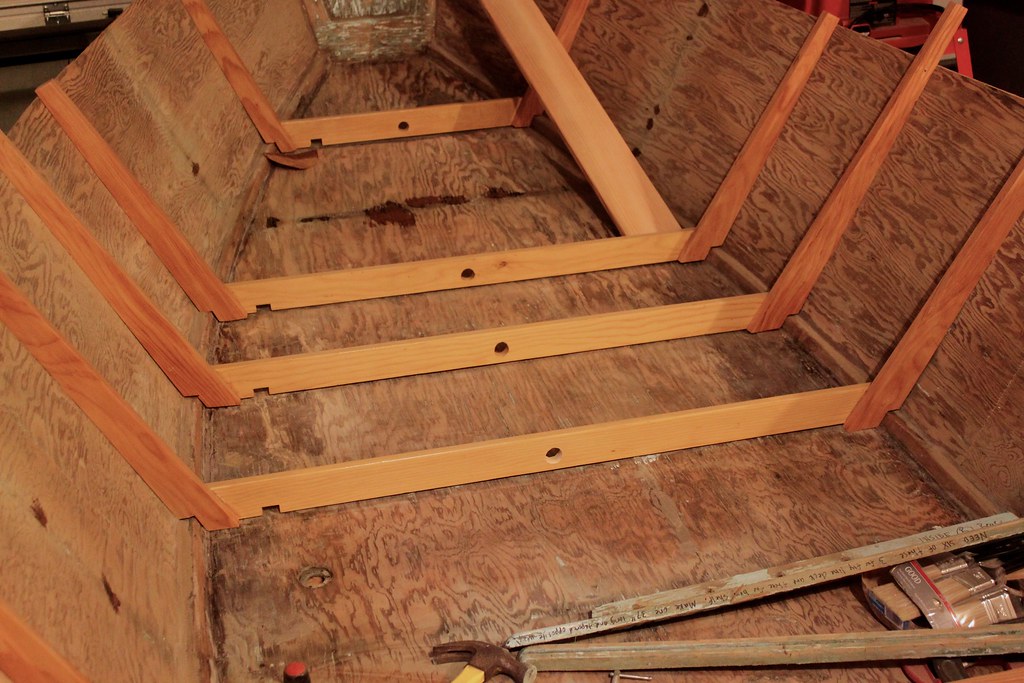
Actually I have been making progress, just reeeeaaally slowly. Over the past few months I made all new frames for it. Got 5 of them put back in the boat and have the final 4 are in the process of receiving 12 coats of varnish. Should be done in time to install this weekend.
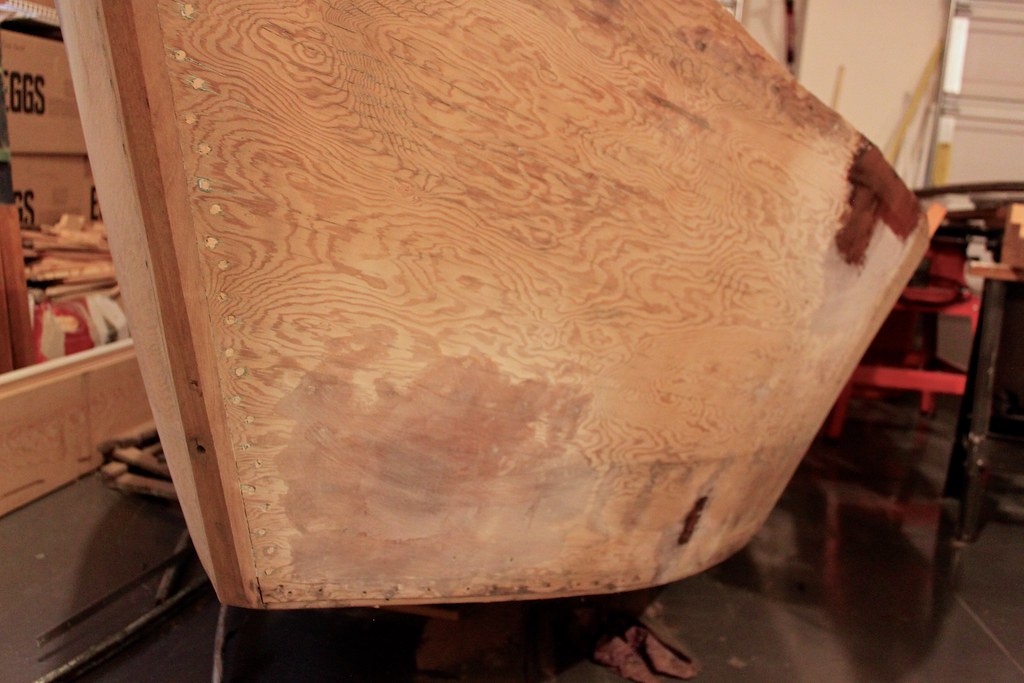
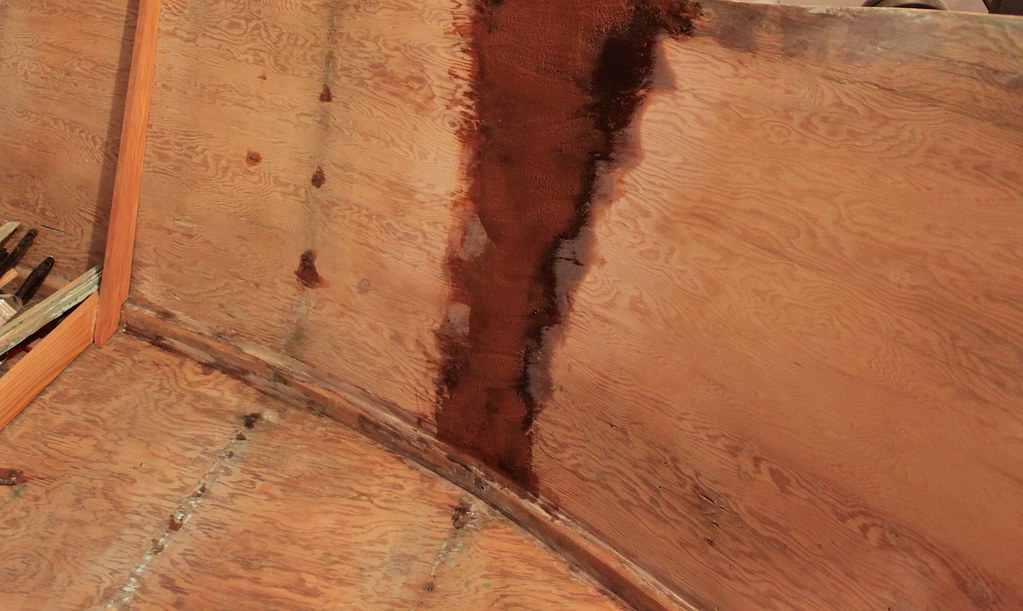
Also did some repairs on the hull. I found a couple places where the hull had been bashed in. Also, there was some fairly extensive rot behind frame #9 (the forward-most frame). Apparently water ran down that frame for a long time because both the frame and the plywood was bad. To repair the plywood I debated about cutting out the whole section and scarfing in new plywood, but I eventually decided to dig out all the rot and fill in the void with thickened epoxy. The repair is no doubt stronger than the surrounding wood but won't look as good. But I figure that part of the character of having a 50 year old survivor drift boat is showcasing its history... which includes its scars. In the photos I have not sanded it out yet. The epoxy repair will lighten up considerably and the surrounding wood will darken considerably once the oil finish is applied. So it shouldn't be as noticeable as it is right now.
A few of the new frames tacked into place...
A view of a hull repair. Looks like it took a pretty good whack at some point...
This is the area that was pretty rotted. The frame that goes here is the one that the knee brace and fly line deck attaches to. This is the third application of thickened epoxy. Hasn't been sanded yet. I think the color will even out a bit. __________________
-
Permalink Reply by CWarmouth on June 28, 2017 at 9:24pm
-
Well, here is a (long overdue) update on my (very slow) progress on the ol' Keith Steele boat.
I have replaced all the frames. Built them with Oregon sourced Douglas Fir as they were originally.
I have built a new rowing seat and miscellaneous other parts that were in bad shape.
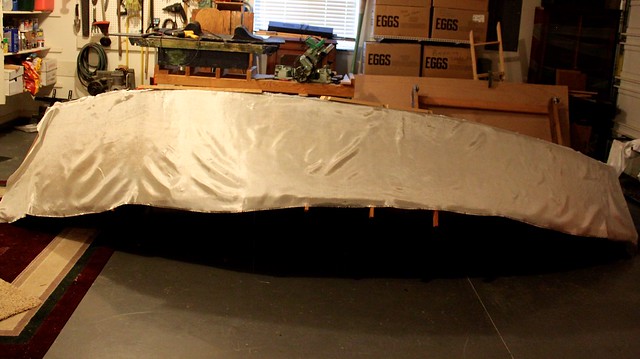
I refinished the bottom using two coats of epoxy followed by a layer of 17 ounce biaxial fiberglass cloth. A layer of 6 ounce cloth followed by two to three more coats of epoxy mixed with graphite powder will come next.
Here is a picture of some 6 ounce cloth draped over the side. This piece is now glassed in place with epoxy.
Slowly but slowly she is coming back into shape.
Thanks for looking.
© 2026 Created by Randy Dersham.
Powered by
![]()