Wooden Boat People
By McKenzieDriftBoat.com
Drift Boat Project #3
Here we go again. Taking a little road trip to Oregon this weekend to pick up a genuine piece of driftboat history – a 1960’s era Keith Steele McKenzie boat.
This will be my third driftboat project and I am super excited to have one that was built and used in Oregon by a legendary builder.
My first boat was an early 1990s Tatman kit that I built while living in TN and sold a few years after building it. My second one was all fiberglass of my own design and build. That one was stolen a few years back.
Now I’m living out west and it just won’t do to not have a drift boat. I have spent several months deliberating on whether to build a super nice wooden one, pick up a cheap used glass one, or look for a Woody Hindman or Keith Steele. As luck would have it, this Steele boat showed up on Craigslist and a friend, knowing I really wanted one snagged it before someone else could. An older guy in Oregon had the boat built for him by Keith Steele sometime in the 1960s after Steele gained notoriety for building the first Grand Canyon dories. He had a stroke a few years ago and realized it was time to let the old girl go.
The boat looks all original and complete and the owner says it is solid and perfectly usable as-is but my friend and I are going to go through and restore her. But maybe we’ll do a float or two in her first.
So what do y’all think… should I finish the whole boat with a bright finish or paint the outside? If paint, what color? My first one was hunter green with a tan rub strip and bright inside. I liked that look. Also thinking of maybe a turquoise color. It currently looks to be painted white.
I'd also really like to go by Steve Steele's shop while I am nearby. Anybody know how to contact him?
Views: 8496
Replies to This Discussion
-
Permalink Reply by CWarmouth on
-
One of the greatest things about the World-Wide-Interwebs is being able to read threads like this and share in people’s victories; learn from their successes. Perhaps even more valuable, or at least funnier, is learning from their mistakes and failures. Boy, I made a doozy. So I thought I’d write about it here to remind myself in case I ever get a notion to do a project like this again or in case there is some other nut-job out there restoring a 5o year old wooden drift boat. “Don’t do this.”
The bottom line is that I overestimated my glass cloth’s ability to hide flaws in my plywood.
Right now I am so jealous of Bennett’s beautiful new mahogany plywood – flat and perfect and gorgeous. I am so jealous of the way his glass cloth went on smoothly and flat and he didn’t have to do any hull fairing to speak of. That’s not really how it went for me.
If you know anything about Douglas Fir plywood, you probably know that it is known for checking pretty badly. All those growth rings dry at different rates and it just gets squirrely. Here are a couple pics from early in the restoration that show the efffectsOver 5o years’ time ends up looking like this: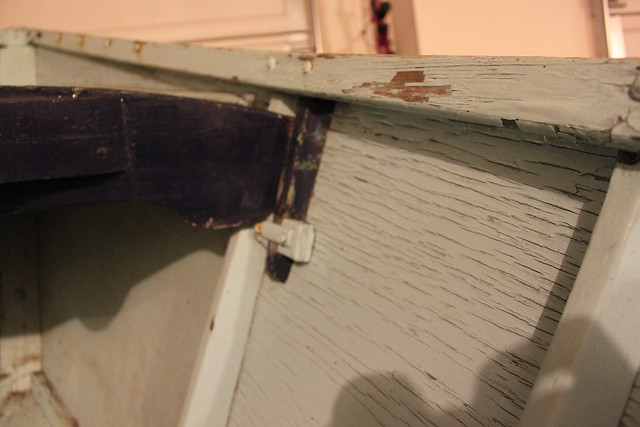
And this: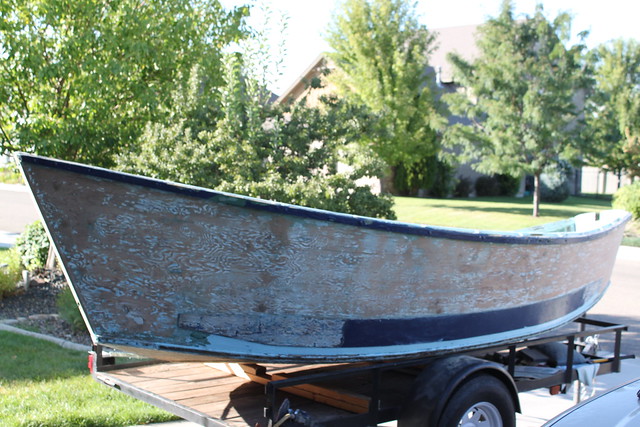
Each of those hundreds of spots of blue paint left behind in that second photo are in a divot in the wood caused by uneven drying over time.
Some people like the look on an old drift boat: old school, classic, authentic, all that. I don’t care for it. So I sanded and sanded and sanded to get that wood flat. It would be flat for a few days then go back. I know that the only way to stop the checking is to cover the wood with glass and epoxy. My mistake came in thinking that the glass and epoxy would create a flat surface. I suppose if I used something like 24-ounce fabric it would have, but the thin 6-ounce stuff I’m using? No way.
So I mixed up some epoxy, applied it to the starboard side of the boat and carefully began applying the cloth, working out the wrinkles and air bubbles. Problem. The glass conformed to every dent, ding, gouge, and irregularity, making for an ugly surface. Worse, the low spots in the wood created air bubbles that just drove me nuts. I have worked with fiberglass plenty in the past, so it isn’t like I shouldn’t have seen this coming. But. I didn’t.
The next morning I got up and it looked even worse than the night before. And hitting it with the sander revealed that it was even worse than that. I wish I had taken some pics of if but I was too bummed out to think of that. Anyway, I knocked down the high spots with a sander the best I could without removing much of the glass and then mixed up some thickened epoxy. I spread a thin “skim layer” over the entire surface, working it into the low spots. I will be sanding it today so we’ll see how it goes.
I hate making mistakes but I hate repeating them even more so I was not about to dive into the port side the same way. I came up with a great solution that worked really well and will post about that later. For now the boat beckons…
-
Permalink Reply by Mike Baker on
-
I feel your pain! I am going through the same thing right now on a Ostrem boat. The owner tried to sand all the paint off (at least 3 different colors) in hopes of having a clear boat. I can't get the color out of the cracks so we are going to do a lot of fairing and painting.
-
-
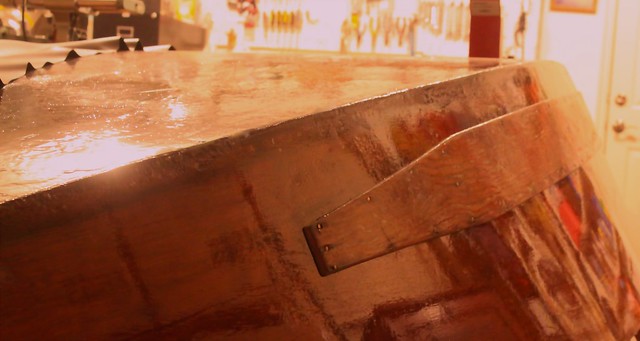
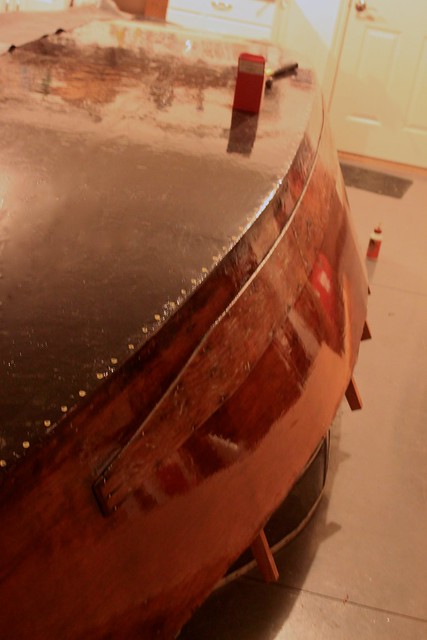
Finally got a nice slick bottom on her. Two coats of epoxy followed by 17 ounce biaxial, followed by 6 ounce woven, followed by three coats of epoxy with graphite.
Feels as slick and hard as a granite counter top.
-
Permalink Reply by Rick Newman on
-
Looking pretty darn good!
Rick N
-
-
Thanks, Rick.
Today's progress: Outside gunnels, cut, scarfed, sanded, and varnished. (Sounds like an item on the Waffle House menu.) Got two coats of varnish on today which pretty much just sucked into the wood. Next I'll apply a few more coats of varnish, sanding with steel wool between coats. It doesn't take much time for epoxy and varnish to cure when it's 102 degrees outside, and it sure feels good to be doing reconstruction instead of deconstruction.
-
-
Moving right along! Good work!
Rick
-
-
Thanks, Rick.
And now for another update: I was so happy the day I got these things off. And so happy to have them back on!
-
-
Keep up the good work!
Rick N
-
-
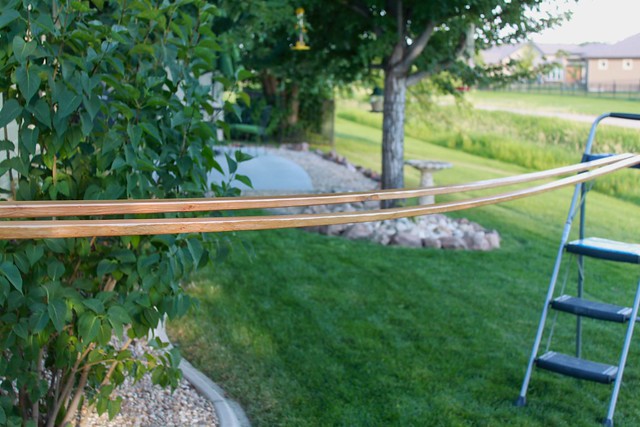
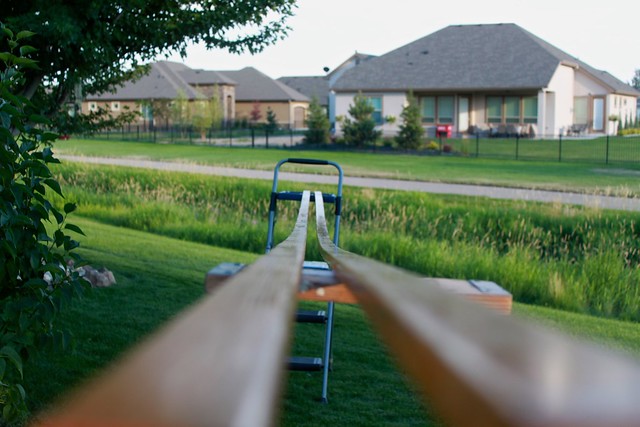
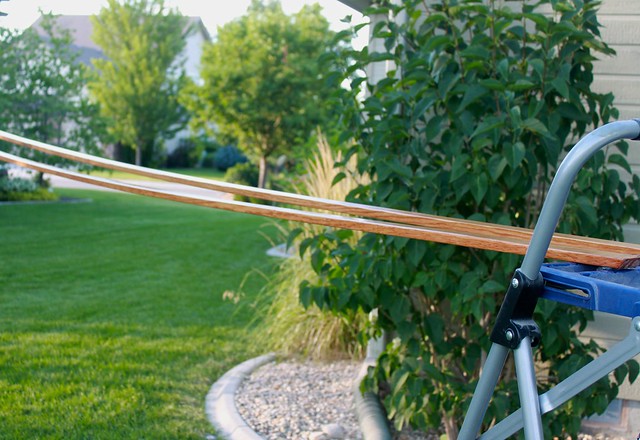
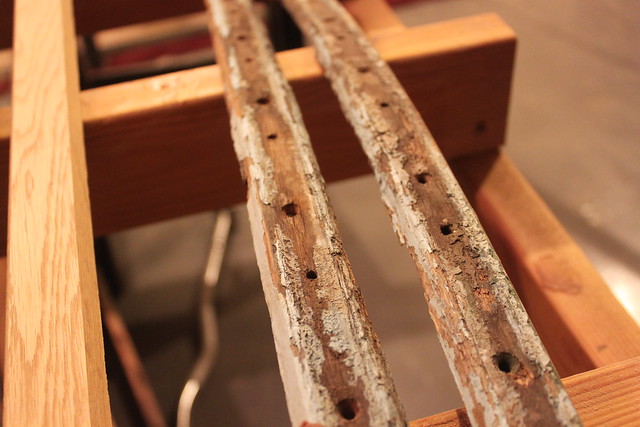
Got some nice new white oak chine caps cut out tonight. The longest length I could find was 4/4 10', so some scarfing will be necessary. Planed these to 1/2" and beveled to the original profile as best I could tell. Maybe just a tad nicer than the ones I took off?
-
-
I was having a discussion with Bennet Yarborough on another forum about the various methods of scarfing lumber for gunnels, chine caps, chine logs, etc. Not necessarily plywood.
It got me curious about the ways other people are doing it? Do you scarf the whole board and then cut out your parts or cut the parts and then scarf them? Making cuts by hand or with power tools?
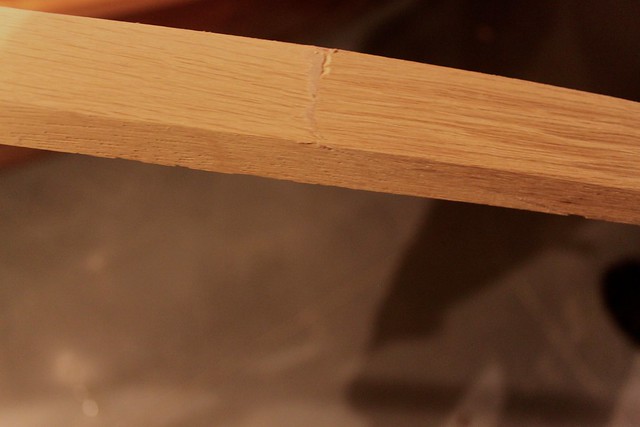
I'm cutting to size and profile, then scribing a 6:1 pattern on the two pieces, clamping the piece in a vice, and carefully cutting on the lines using a Japanese razor saw. It is very precise. If I do get a high spot I hit it with a rasp or block plane to flatten it out. Then I lay the pieces on the bed of my compound miter saw and use it as a straight edge and clamp it down flat for glue up.
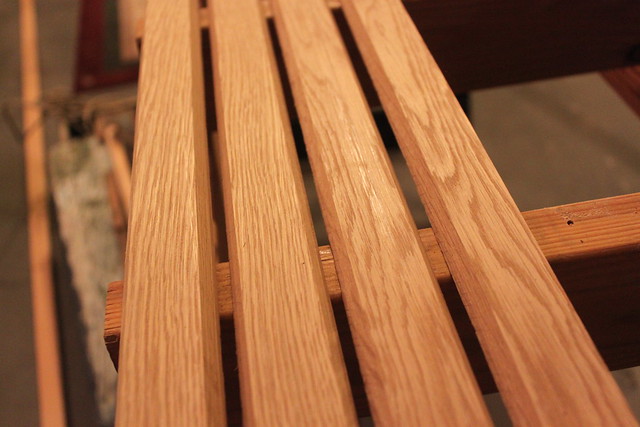
Here’s close-up detail of the first chine cap scarf after knocking down the glue squeeze-out with a paint scraper and a few passes of 60 grit by hand. Keep in mind this is a 1/2" thick piece of wood so this is really close-up. I’m sure it could be better but I am satisfied with it considering the application. There is a little gouge where that feather edge must have gotten broken off during glue-up. I might dab a little wood putty in there. Or not. The joint is hardly noticeable at 10 feet and I suspect it’ll look a little better once I sand the whole strip with some 150. And I suspect it’ll look a whole lot worse after a few trips on the river.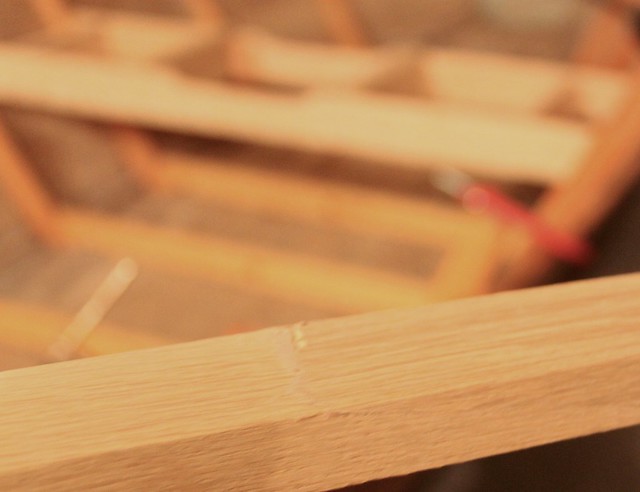
-
Permalink Reply by Jayson Hayes on
-
6:1 is pretty risky, this joint could possibly hold long enough for install and then later pop open causing you to have to repair it again. Not sure I would risk it on a chine cap that it going to get hit several times. I typically go with a 12:1 for all chines and chine caps.
-
Permalink Reply by David Witton on
-
I'd definitely go with a 12:1 scarf - you can find a picture of the tablesaw jig I use here.
© 2026 Created by Randy Dersham.
Powered by
![]()