Wooden Boat People
By McKenzieDriftBoat.com
Drift Boat Project #3
Here we go again. Taking a little road trip to Oregon this weekend to pick up a genuine piece of driftboat history – a 1960’s era Keith Steele McKenzie boat.
This will be my third driftboat project and I am super excited to have one that was built and used in Oregon by a legendary builder.
My first boat was an early 1990s Tatman kit that I built while living in TN and sold a few years after building it. My second one was all fiberglass of my own design and build. That one was stolen a few years back.
Now I’m living out west and it just won’t do to not have a drift boat. I have spent several months deliberating on whether to build a super nice wooden one, pick up a cheap used glass one, or look for a Woody Hindman or Keith Steele. As luck would have it, this Steele boat showed up on Craigslist and a friend, knowing I really wanted one snagged it before someone else could. An older guy in Oregon had the boat built for him by Keith Steele sometime in the 1960s after Steele gained notoriety for building the first Grand Canyon dories. He had a stroke a few years ago and realized it was time to let the old girl go.
The boat looks all original and complete and the owner says it is solid and perfectly usable as-is but my friend and I are going to go through and restore her. But maybe we’ll do a float or two in her first.
So what do y’all think… should I finish the whole boat with a bright finish or paint the outside? If paint, what color? My first one was hunter green with a tan rub strip and bright inside. I liked that look. Also thinking of maybe a turquoise color. It currently looks to be painted white.
I'd also really like to go by Steve Steele's shop while I am nearby. Anybody know how to contact him?
Views: 8496
Replies to This Discussion
-
Permalink Reply by Kurt Selisch on
-
White oak is very hard and does not absorb epoxy especially well. I agree with Jason, the longer the scarf joint, the better. If you don't want re-do your scarf joints, as you install the chine cap, sink a couple screws through the joint to help keep it from de-laminating down the road. When you get ready to do the handrails and gunnels, go big on the scarf. Also on that feathered edge, I would mix up some epoxy with wood flour to fill. I know it is a pain for such a little spot, but wood putty is not going to hold up well being constantly in the water and if there is a little void in the epoxy where that feathered edge is, you will want to seal it up. Good luck and glad you are making progress.
-
Permalink Reply by CWarmouth on
-
Hi guys, thank you so much for the advice. By the time I had posted the previous entry I had already installed the outside gunnels and port side chine cap. I'm going to cross my fingers and hope for the best. I went ahead and did a 12:1 on the pieces that will become the inner gunnel and the starboard side chine cap. We'll see how it all goes. A couple things I will mention is that with all of these parts:
I did lean them up against the side of my house for a few days for a sort of torture test. They are 18-20 feet long so there was an extreme bend in them on the glue joint. Way more extreme than the gentle curve of the boat. 100+ degrees here during the day and 60s at night, so some temperature variation.
On all the pieces I put a coat of epoxy on each of the pieces and let it cure before clamping to get the best bond. After it cured I scuffed it and then put another very slightly thickened coat and clamped it.
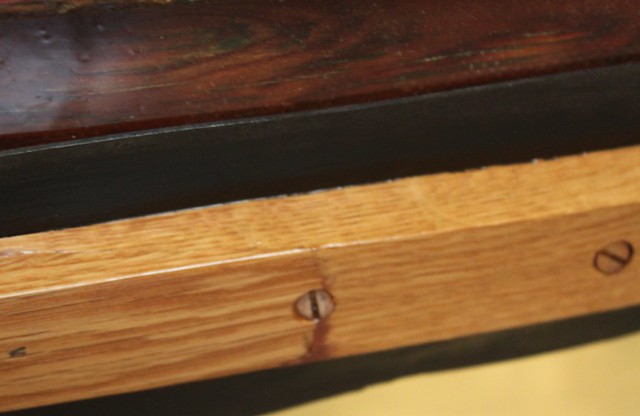
Kurt, I did as you suggested with the wood flour/epoxy. And I did also position the chine so that there is a screw through the joint. Two actually. I am replicating what Keith Steele did on this boat as closely as I can and he had screws every two inches. In the picture below you can see what I mean. That black dot will be a screw but I haven't drilled it yet because it is for the aluminum strip that goes over the chine cap and I am not drilling those until I am ready to put it on. So right now there are screws every 4 inches but that will change.
Speaking of the aluminum strip, I think that will help with that scarf joint as well. The oak is basically sandwiched between the hull and that strip with a LOT of screws pulling everything tight.
We shall see.
-
-
Remember this stuff?
It kept the rot out of the plywood for ~50 years so I thought I'd go with it again.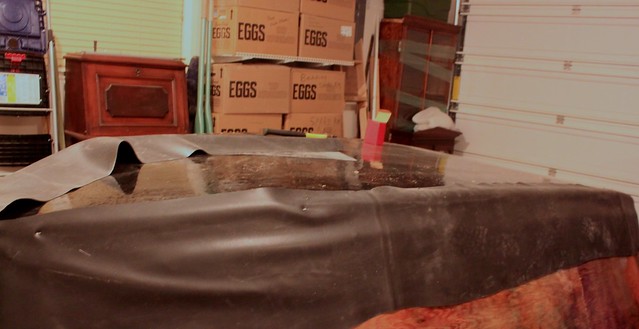
-
Permalink Reply by Mike Baker on
-
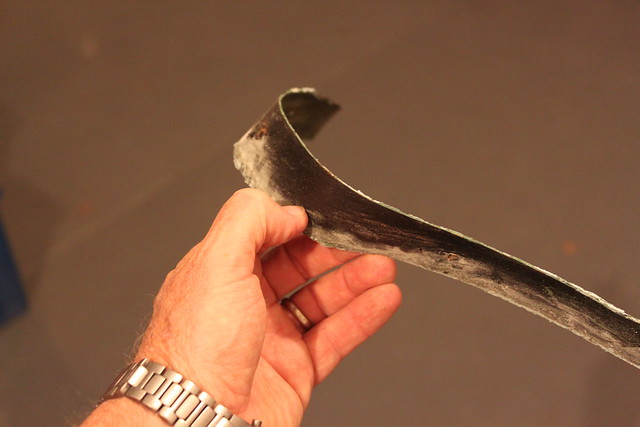
What was that stuff? Steve talked about it once but I can't remember, he gets it in big rolls. Seems like you could use that stuff with something like Trex decking for an indestructible chine cap that would still seal.
-
-
Oh, man. That's a great idea, Mike! Back in the 1990's I built a hand laid fiberglass boat and put oak gunnels on it. In the early or mid-2000's I took them off and made gunnels from a Trex-like product. It was grey so it complimented the color scheme of the boat nicely. I'll attach a picture below.
A person could also use a solid UHMW strip using the rubber as a seal for that matter. The Trex would look more like wood though.
I bought the rubber from a farm supply store. My local store is called D&B Supply. It is butyl rubber pond liner. They do indeed have it in large rolls of various thicknesses. I bought one linear foot and it was 20' long.
Thanks for the comment.
My previous boat with engineered wood gunnels...
-
-
Looking good CW. Very cool you are replicating how Keith built the boat. So the rubber pond liner, do you also use bedding compound underneath it? Or does the rubber seal well enough on it's own? Using Trex type decking material on a boat is intriguing for sure. I am not that familiar with it. Being a composite I assume it is totally waterproof and pretty bomber.
-
-
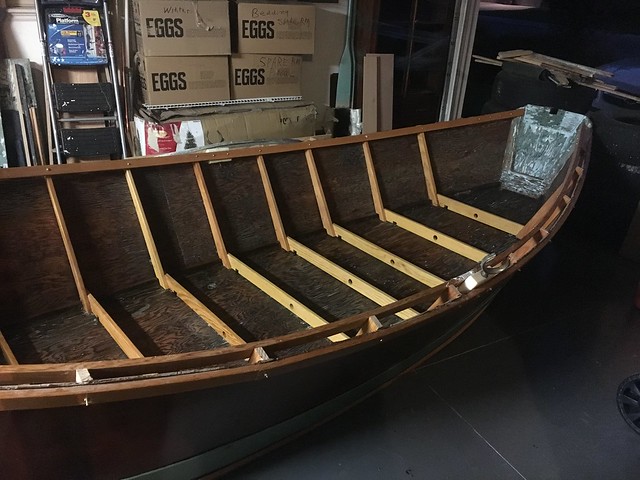
Hello Friends. Just thought I'd post an update in case anyone is still interested in this project. It has been a long time since I have made any progress on her. On August 9, 2017 I herniated a disc in my back. The next six week were a living hell and I finally had surgery on September 19. Life has not been the same since but this summer I finally started being able to get around decently again, and I just got back to work on the boat about two weeks ago. It's been a long, painful road but I am finally able to at least lead some sort of a normal life again. Anyway, enough of all that.
The past few nights and weekends have actually been pretty productive. I was able to get the gunnels on, a knee brace made, restored the original front seat, and a few other odds and ends. But a big breakthrough is that I have actually made enough progress on hull repairs that I was able to start putting a finish on the inside of the hull. I decided on an oiled finish because it is a good choice for the arid environment where I live. Man, this old wood is so dry. In the following pics I have applied three coats of 50/50 boiled linseed oil and turpentine and so far it has just sucked into the wood within minutes. Other than turning it dark, there is no indication that there is any kind of finish on it at all. It just feels like dry wood. The rule of thumb, as i understand it, for an oil finish is once a day for a week, once a week for a month, once a month for year, and once a year thereafter. So that is what I am going to try.
The gunnels and frames are varnished and I am going to leave the transom the way it is (with remnants of all the colors that this boat has been over the years) as a nod to its history.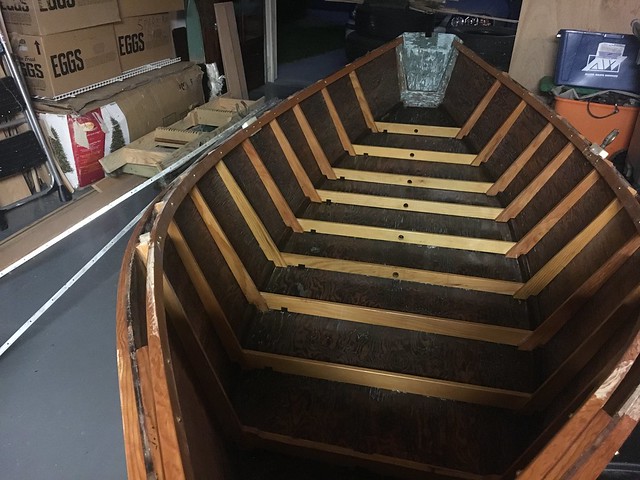
-
Permalink Reply by Rick Newman on
-
CW, thanks for sharing! I can relate to your back pain. Twenty plus years ago I stopped where requested by a traffic control person. The next thing I knew a car that had been following me an unknown distance behind apparently didn't see me or the controller. The Saab she was driving sustained a good deal of damage and the force transferred to me was enough to break the seat mount and injure my back. Long story short, after ninety plus doctor visits I could do some of the tasks and activities I had prior to the injury. They can't cure cancer, the common cold or permanently resolve back pain, at least in my case. The pain returned with a vengeance three years ago. Walking across the street to get the mail felt like the Lewis and Clark's Corps of Discovery journey across the nation. Again back to the doctors, ERI's, MRI's injections, nerve killing and so on. Two weeks of relief at a time didn't cut the mustard so to say. Anyway, I found a medical professional that investigated my issues and found a method to reduce my pain and in doing so gave me my life back. I occasionally can overstress my lower back but over the counter pain meds do the job on it.
So, like I said I can relate. I have never tried the system you are using but the interior of your boat does look good! Keep up the good work and keep us informed!
Rick Newman
-
-
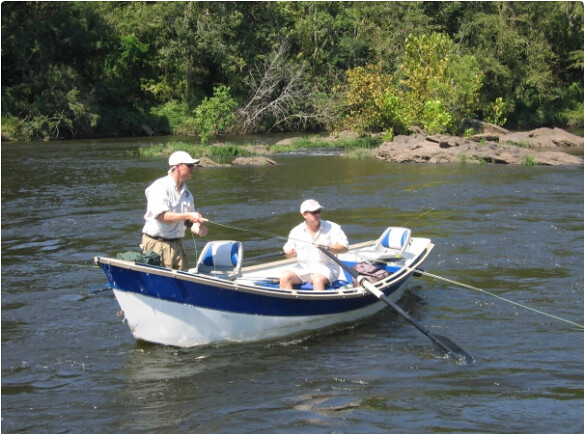
Well... I have a LOT of excuses for why it took me 5 years (almost to the day) to finish a restoration that I thought would take 6 months. But alas, tomorrow is the long awaited day. I am taking her on her inaugural float. She is not all the way finished (still have to add the knee lock upholstery, cup holders, and a couple odds and ends) but everything is done that is necessary to get on the river. It's been quite a laborious experience to get the old gal this far. I never imagined it would take THIS LONG! Hopefully all goes well tomorrow. Stay tuned for river pics.
[img]https://live.staticflickr.com/65535/50153394531_5ee2089073_z.jpg[/img][img]https://live.staticflickr.com/65535/50153394321_a234df8a85_z.jpg[/img]
-
-
Well, after a 5 year labor of... well... a labor... she got her first float in God knows how many years. I put together a quick video to document the big day.
-
Permalink Reply by David Witton on
-
CW - nice video and a great looking boat - what's that water you were floating?
-
Permalink Reply by Phillip Westendorf on
-
CW,
Well done, a fine looking boat! Hope you get lots of time on the water!
© 2026 Created by Randy Dersham.
Powered by
![]()